
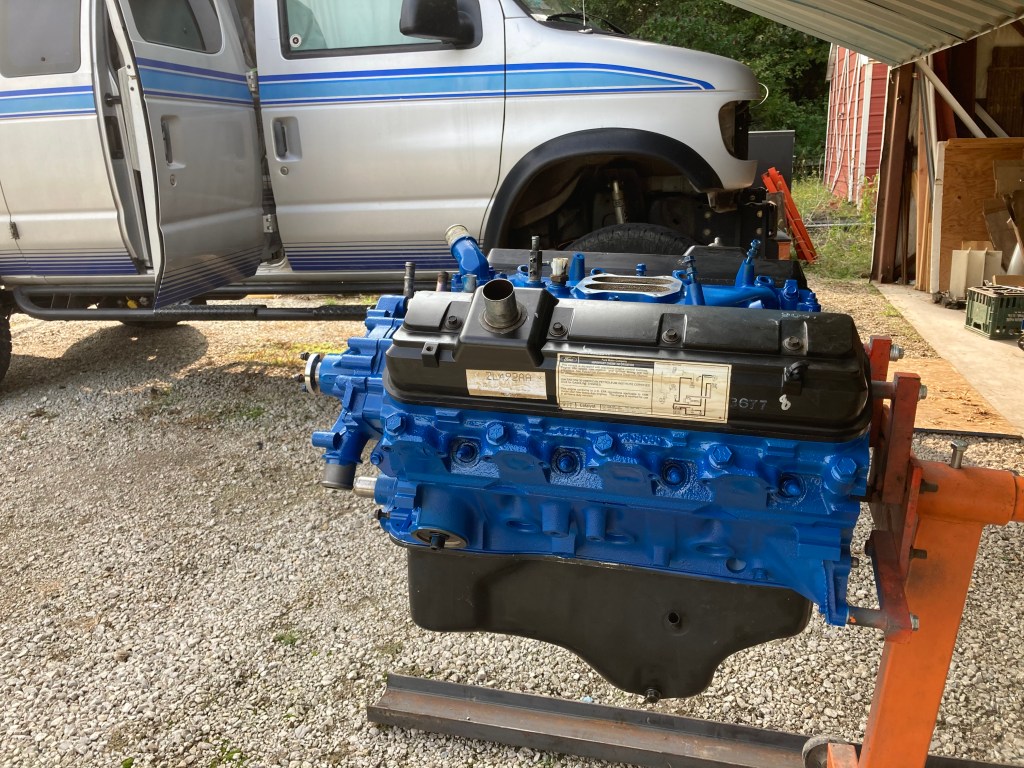
TLDR; We installed a new 7.5l long block from Promar engines with the “RV” cam upgrade, added Doug Thorley headers, new injectors and a 200A alternator (to help charge the house batteries). The swap took 17 days from start to finish (mostly part time effort). Headers took 3 days to install. Total cost about $5k.
The result: noticeable improvement in mid-range torque, about 1.5 mpg improvement in gas mileage, MUCH quieter on the inside and sounds awesome on the outside! (Parts list at the end.)
The Long Version
We replaced the engine in Hugo recently. The engine still ran pretty well but had some issues.
First, we had close to 200k miles on it. Some people say “drive it till it quits” but since we live full time in the RV, it quitting isn’t likely to happen at a time or place that’s convenient. I’d hate to be on the road somewhere and have a major engine issue, have to find a mechanic, work on their schedule, and pay a bill that would cover a large part of the cost for a new engine.
Second, the right-side cylinder head had a broken off exhaust manifold bolt hole. (I’ve heard it’s a fairly common problem with the 7.5l.) We couldn’t get a good seal between the head and exhaust manifold. This gave us a constant ‘click click click’ noise with the engine running. We got use to the noise but it was annoying.
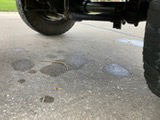
Finally, the oil leaks. This was really the last straw for me. A few years ago we had a rear main seal leak fixed (at considerable expense). After that we started getting leaks around the oil pan. Those got bad enough that we had a mechanic replace the oil pan gasket. In the process he noticed one of the bolts was twisted off. That bolt was over the cross member so to fix it he would have to remove the engine. Not going to happen. Copious RTV along the gasket stopped the leaks for a while but they came back, worse than ever.
Since we had a little down time coming up before winter (Sept – Oct 2020) and had a place to do the work with access to the necessary tools, it was time to do it. Here’s the story…
The Engine
I considered taking Hugo to a local rebuilder for a turn-key engine rebuild. However they couldn’t accommodate Hugo’s size. Then I considered pulling the engine myself and taking it to them for rebuild but they would need it for at least a couple weeks. I didn’t want to be out of commission for an extra two weeks. That left getting a long block and have it ready for me at the start of the process.

Internet sleuthing took me to Promar Engines. They had good reviews, a good warranty (3 yrs), and the best price I could find. I opted for the “RV camshaft” upgrade that should improve mid-range torque. They don’t have a core charge but you have to return your old engine to them within 30 days of delivery of the new engine. Normally their shipping is free for both the new engine and the core return. However since I needed delivery to a residential address and liftgate service there was a $250 shipping charge. Still the total cost was only $3,099. The engine includes a new oil pump.
One thing about Promar. They give you a list of parts that need to be replaced new for them to honor the warranty. They also have specific oil requirements for break-in. You’ll need to provide receipts for these items to make a warranty claim. Some of the items that need to be replaced are the oil pickup tube and (optional) oil heat exchanger found on some models. Basically if your old engine blew up, they don’t want metal fragments to find their way into the new engine. Makes sense.
Removing the Old Engine
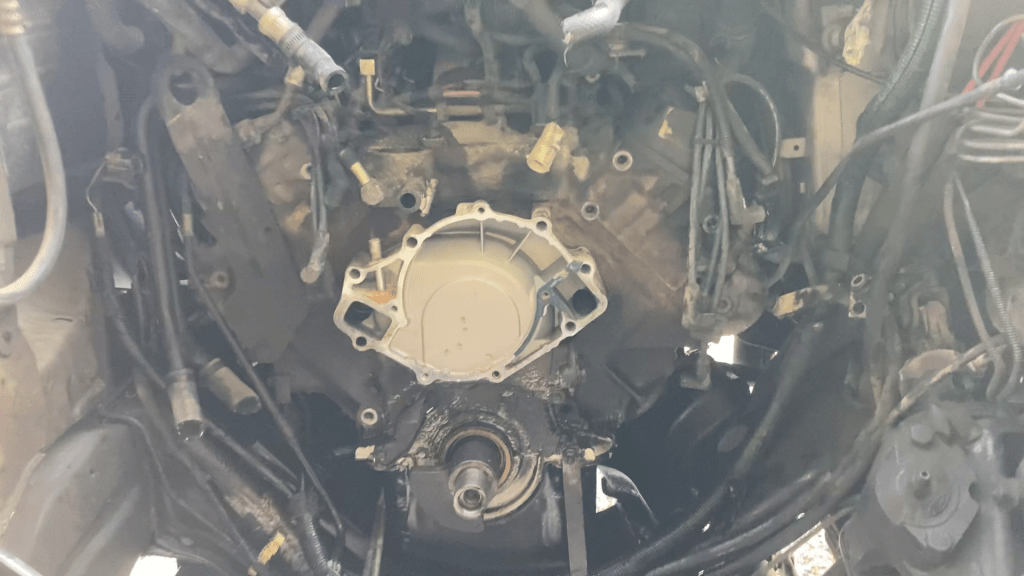
The engine comes out the front of the RV. That means that you have to remove everything forward of the engine. Bumper, grill, lights, frame, A/C condenser and radiator. The transmission stays in the vehicle. You separate the engine at the transmission bell housing. I put screws and bolts in plastic bags along with a label of what they belonged to. I taped the bag to the item and sat them out of the way.

The next step is to disconnect everything that ties the engine to the rest of the vehicle. This include fuel line, heater and a/c hoses, and electrical connections. I took pictures, lots of pictures from multiple angles to see what connected where and how things were routed. This mostly worked but I could have used more pictures. How things were routed wasn’t always clear. I strongly recommend that you NOT rely on memory for this.
It is a tight fit in there. The limiting factor is the height between the cross member at the front wheels and the top of the engine bay. The engine has to come up enough to get the oil pan over the cross member without running into the top of the engine bay. So I had to make the engine as small as possible. I removed all the front accessories including the water pump, the belt pullies, harmonic dampener, and all of the intake above the intake manifold.
I’ve heard some people use a fork lift under the exhaust manifolds to pull the engine but I didn’t have access one. I did have an engine hoist. I would have liked to use an engine leveler on the hoist but there isn’t enough room. In fact I couldn’t even use a chain between the engine lift brackets and the hoist. Not enough room.
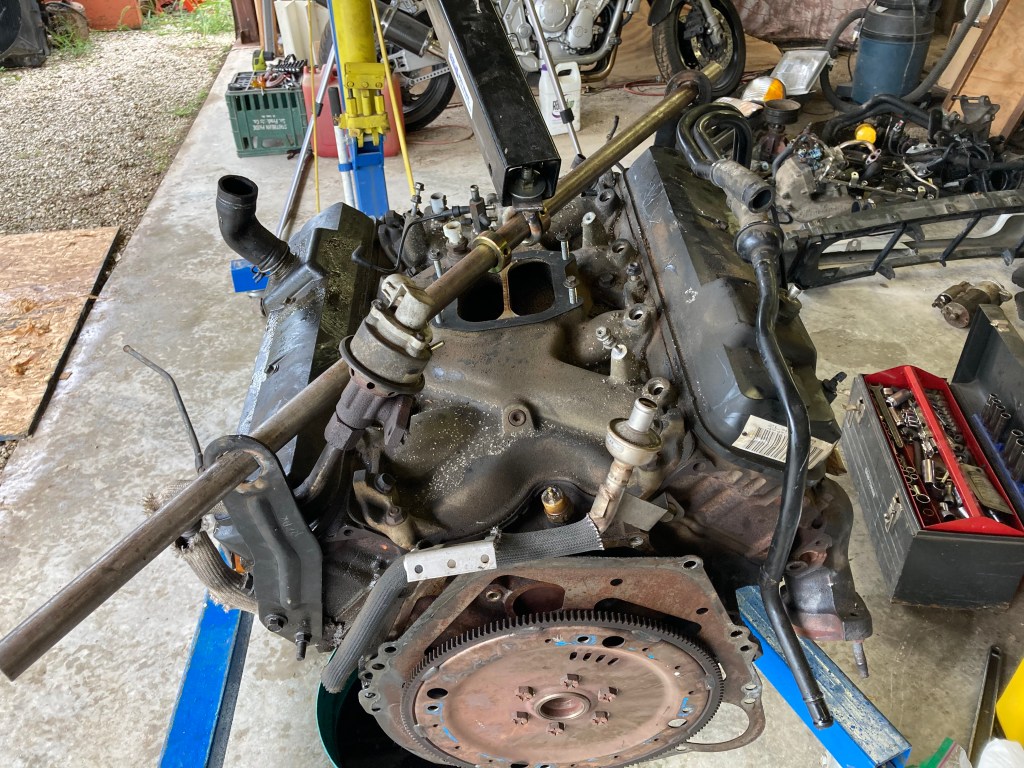
Instead I put a 1″ steel rod through the engine lift brackets and through an eyelet bolt on the hoist. To keep the steel rod from slipping around, I welded it to one of the engine lift brackets and used lock collars on each side of the hoist hook. This gave me just enough head space to lift the engine and get the oil pan over the cross member. I could also move the lock collars to position the hook where I needed it to get the engine tilted properly.
The rod could have been a little shorter in back. It did run into stuff as we removed the engine. I hated to cut it for this one-time use so we made do.
Tip from experience: remove the dipsticks and dipstick tubes before removing the engine. I broke both.
Swapping Parts
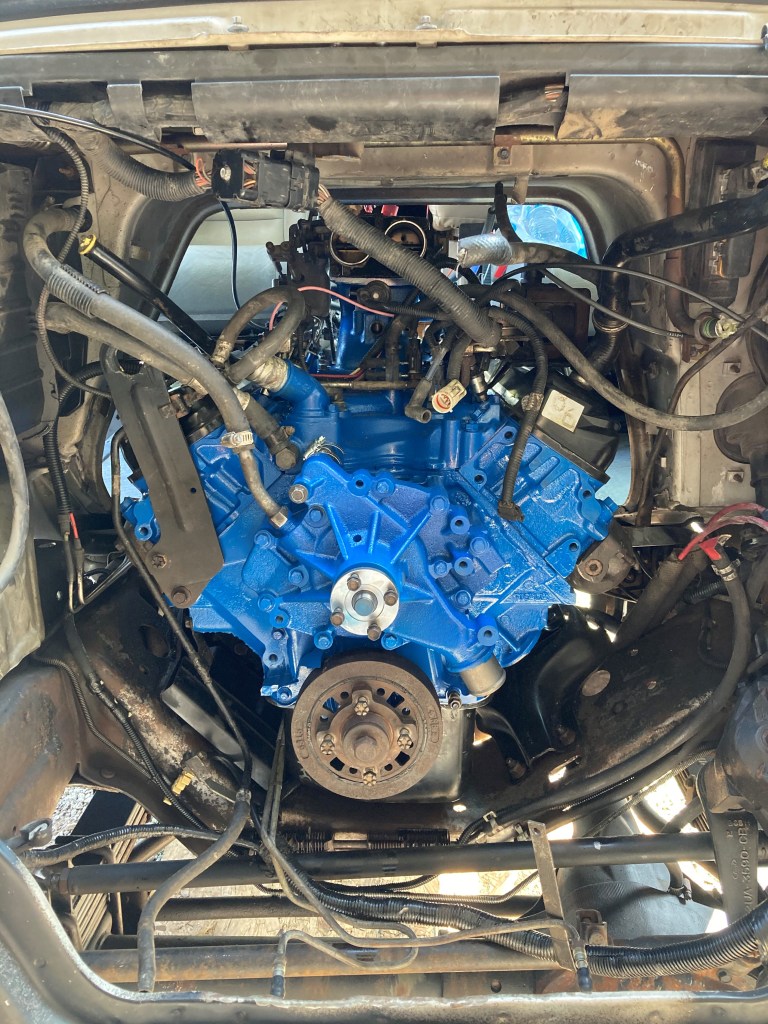
Many parts from the old engine are swapped to the new. Intake manifold, throttle body, rocker covers, oil pan, distributor, etc. Some things I replaced new such as the fuel injectors, spark plugs, distributor cap and engine mounts. I also took this opportunity to upgrade to a high-output alternator (200A max, 140A at idle).
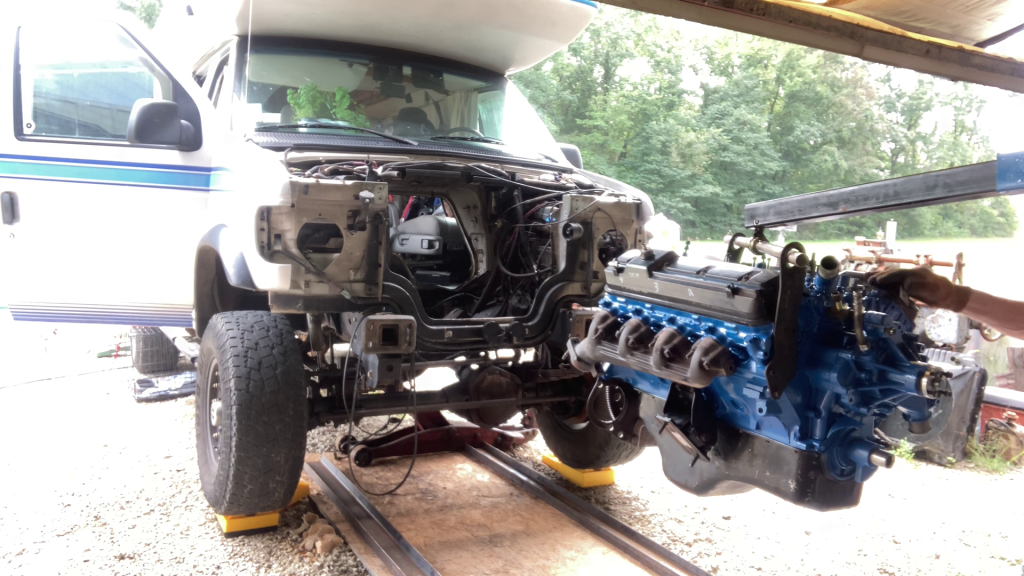
I left the old engine on the engine hoist with the new engine on an engine stand. That way I could remove a part from the old engine, clean it up, then install it on the new engine. I only replaced those parts that I felt wouldn’t interfere with reinstalling the engine. Here’s what it looked like just before installation….
The rest gets installed after the engine is bolted in. The old block gets put on the shipping pallet and sent back to Promar.
Tip from experience: look over the old engine several times before you crate it up for shipment. Have someone else look it over too. We almost missed a fitting for the oil heat exchanger left in the old block.
Installing the New Engine
This is really just the reverse of removing the engine. The challenge is getting the engine lined up with the transmission. With the engine bolted in, the work is reinstalling the remaining parts and hooking everything up. I worked from the back to the front of the engine. Here is roughly the order I followed:
- Fuel injectors and fuel lines
- Throttle body
- Throttle cable and cruise control cable
- Rear electrical wiring
- Distributor
- Spark plugs and plug wires
- Harmonic dampener and pully
- Accessories – A/C compressor, alternator, power steering pump, etc.
- Front electrical wiring
- Radiator and A/C condenser
- Front grill frame
- Lights
- Grill
- Bumper
- Air intake and filter
At this point I started the engine and set the timing. Then I started the break-in procedure which began with 20 minutes of high idle (~2000 rpm) varying a few hundred rpm faster and slower over the period. Then I shut it down and looked for leaks.
Installing the Headers

I had no idea you could get headers for a Ford E350 until someone on the Facebook B190 group mentioned they had Doug Thorley Headers on theirs. Headers on Hugo, heck yeah! Even though the headers were shows as “out of stock”, I contacted them anyway and learned they were planning another production run in a month or so. I placed the order and true to their word, it shipped about a month later. Pricey but they look really good and seem to be good quality. Nice ceramic coating. Too bad the only ones to ever see them are the oil change pit guys.
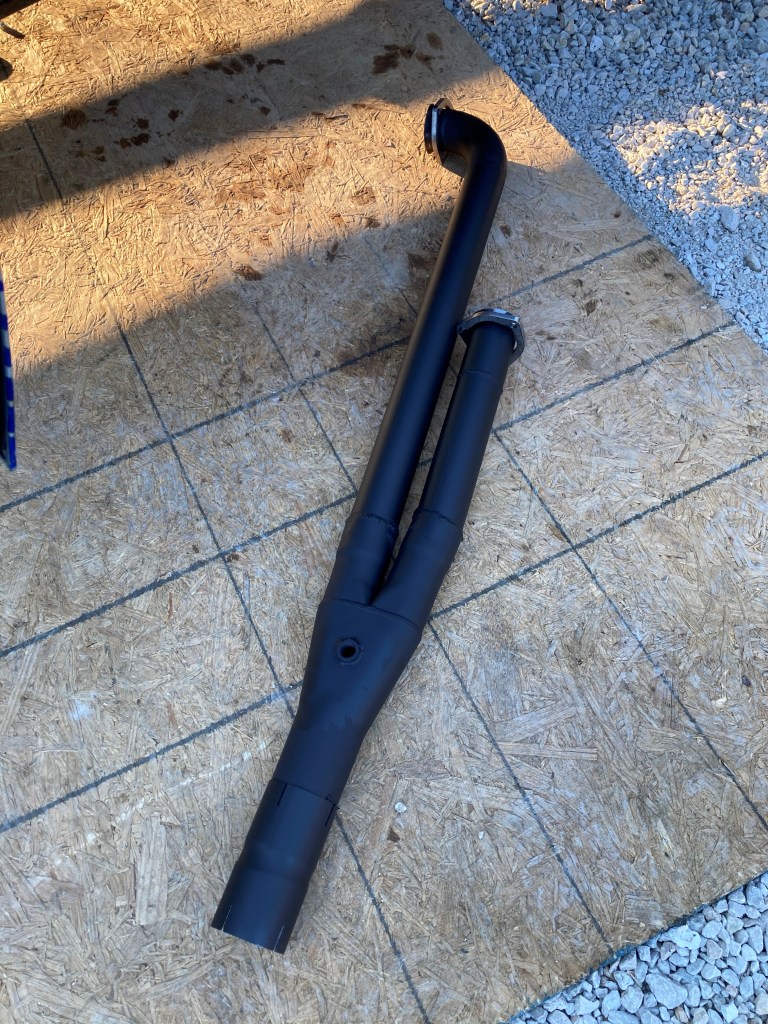
Getting headers installed was easy. No more than 30 minutes. I was underneath positioning them while Lynn got a few bolts started. Then I moved up top to finish bolting it in. For things that mount to lugs on the exhaust bolts (e.g. the ignition coil and power steering pump brace) just use the old bolts.
I was hoping to reuse the existing Y-pipe so I didn’t have to fabricate much. That wasn’t going to happen. The left header collector exits too close to the right header for the existing Y-pipe. I had to fabricate the exhaust back to the muffler.
Issues Encountered
- My engine had the optional oil heat exchanger. This fits in place of the oil filter and repositions the oil filter to point forward. Radiator hoses route fluid through the exchanger. Promar required this to be replaced or removed. Since I couldn’t find anywhere to buy one, I opted to remove it. Now the oil filter attaches directly to the engine block. There isn’t much room there between the engine and the frame cross member for an oil filter. I had to shorten a bolt so the filter would fit. Then I had concern the filter would hit the bolt under some engine load conditions leading to a hole in the filter. So far that doesn’t appear to be an issue.
- I didn’t install the oil pump drive shaft when I installed the oil pump. I should have. In my previous experiences working on engines it was easy to drop the shaft in from the top when you install the distributor. Not so easy to get things aligned in the 7.5l. I wasted a lot of time getting the shaft inserted into the oil pump. (Ultimately I got a set of long needle nose pliers. Even then I had to grid them down to fit in the hole.)
- Before the first engine start, you have to prime the lubrication system. That means using a drill attached to the oil pump drive shaft (see #2 above) and drive the pump until the oil pressure comes up. I found that I could use a 3/8″ socket on the hex shaped shaft and with a long socket extension get it high enough above the engine I could get a drill on it. You don’t want a hacked up tool like this coming apart in the engine so I used tape to hold it all together. Easy right? Well there is a hole in the engine block about at the top of the oil drive shaft. I suspect the tail of the distributor fits in this hole to give support. The hole is just big enough for a 3/8″ socket but not big enough for a 3/8″ with tape wrapped around it. So I insert my contraption into what I believe is the oil pump and start it spinning. Nothing on the oil pressure gauge. Turned out the tape was siting on that hole and pealing itself away, not turning the oil pump. When I pulled it out to see what was going on, the drive shaft stayed in. (Thank God I didn’t lose the socket down there!) It took me several hours to fish the oil pump drive shaft out. (Subsequently I welded an old shaft to a steel rod and got the system primed.)
- The left header is pretty close to the doghouse. In my case the doghouse alignment tab near the gas pedal was too close. Under load with the engine twisting clockwise, a header tube would touch that alignment tab. (You can imagine my horror first time putting a load on the engine and hearing a metal clanging noise. Not cool!) I just drilled out the rivets holding the tab to the doghouse and moved it.
- I forgot to put RTV on the thermostat housing. Of course it leaked. Even though there was radiator fluid puddled on the water pump, there was also coolant dripping off the transmission. That really confused me about the location of the leak. I though it might be coming out around the intake manifold. That would have been sad.
- I wanted to see if the engine would start before reinstalling all of the engine compartment pieces including the radiator. Just running for a second or two wouldn’t be a problem without coolant. What I didn’t consider was the transmission. Without the radiator the transmission cooling lines are not connected. Starting the engine gets the transmission fluid pump going and had it shooting transmission fluid out those lines! That was funny.
- There is a bracket that goes from the back of the power steering pump to a lug on the exhaust manifold. The oil dipstick tube bolts there as well. That thing was horrible to connect.
- As mentioned above, I didn’t remove the dipsticks before removing the engine. As I bounced the engine around getting it out, I broke the handle off both the transmission fluid dipstick and oil dipstick. I couldn’t find replacement parts for either. On the transmission dipstick it just broke off the finger loop. What was left still plugged the tube and had enough to grab so I’m ok with it. The oil dipstick however broke off below the end of the tube. Since I couldn’t find a stock replacement I drew one up in a CAD program then 3D printed a new one. So far so good.
- One of the pins that aligns the engine to the transmission bell housing stayed in the bell housing. I didn’t notice that. The new engine had both pins in the block. When I tried to bolt the bell housing to the engine I couldn’t close up the gap. The old pin in the bell housing aligned to well with the pin in the engine block that it just looked like the pin going where it was suppose to. I couldn’t figure out what the problem was. Lynn’s eagle eye spotted that one.
- It took a fair amount of trial and error to get the oil dipstick tube routed through the headers and aligned properly with the oil pan. In fact the first time out I didn’t have the tube all the way in the oil pan due to misalignment. That caused oil to leak. (It was sad indeed on our first trip out to see a big oil spot under Hugo.)
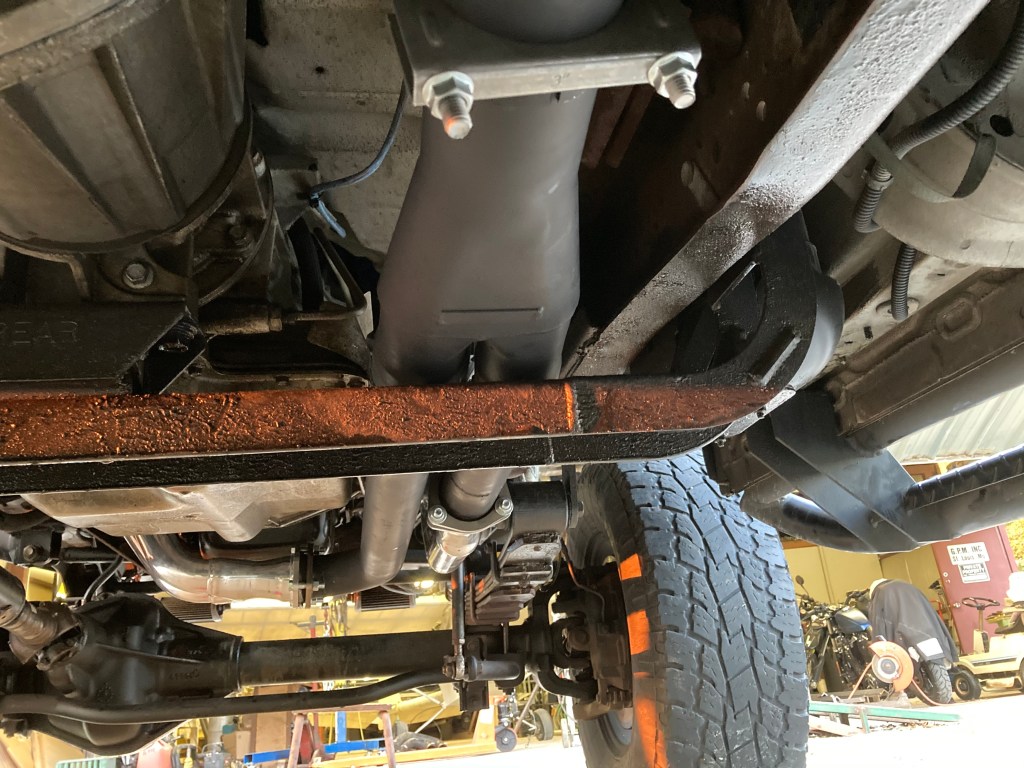
- The right side sway bar link is bolted to the frame. That bolt interfered with the headers. I drilled a new hole through the frame and moved the link about an inch forward.
Overall it took me 17 days to swap the engine, working several hours a day and most of the day on weekends. The hardest part was messing with that darn oil dump drive shaft. Seriously. The headers came a week later and took three days to install. Most of that was spent fabricating a new exhaust back to the muffler.
Results
I wish I’d done some timed 0 to 60 runs with the old engine. That way I would have real data about the before / after performance improvement. Alas, I didn’t think of it.
The first thing I noticed was how quiet it was inside. At highway speeds the engine can’t even be heard above the road noise. This was never true before.
Second, there is a noticeable improvement in mid-range torque. Now I can go up moderate inclines without it downshifting. On steeper inclines I can maintain speed or even accelerate better than before.
I was hoping for a big improvement in gas mileage but it turned out to only be a modest gain of about 1.5 mpg. Over a couple thousand miles since the swap we’ve averaged about 8 mpg. Not much but I’ll take it.
Future Plans
To get maximum performance from the new setup (cam and headers), I want to try reprogramming the engine control unit (ECU). Moates.net makes the hardware one needs to read, update and program the Ford ECU. They even have hardware to support two user-selectable tuning profiles. Say one for performance and one for economy. (Like the “Eco” or “Sport” modes in newer vehicles.) Maybe I can bump the mpg up a little more and still get the power I need when pulling the trailer. That would be cool.
I got the hardware from Moates to do the programming but haven’t had time to try it out. I’ll let you know how it goes.
Parts List
Below are the major parts used in the swap. Other than the engine and headers I got these from Summit Racing. Smaller parts like nuts, bolts, belts, hoses, etc. were purchased at the local auto parts store.
The prices shown are what I paid, they are likely different now.
| Part | Cost |
| Promar FO460-03 88-97 460 FORD TRUCK L.B. | $2,449.00 |
| Promar RV Cam upgrade | $400.00 |
| Promar Shipping (residential delivery + liftgate service) | $250.00 |
| Doug Thorley Headers THY-214Y-FI-C | $775.00 |
| Powermaster Truck Alternators 47761 | $289.99 |
| ACCEL Fuel Injectors 150826 | $335.95 |
| E3 Spark Plugs E3.42 | $55.92 |
| Ford Performance Spark Plug Wire Sets M-12259-C460 | $47.99 |
| MSD Distributor Cap 84083 | $39.33 |
| Motorcraft Distributor Cap Rotor E6TZ12200F | $23.99 |
| ARP Oil Pump Driveshaft Kits 154-7903 | $18.99 |
| ARP Oil Pump Bolt Kits 150-6902 | $11.99 |
| Flowmaster Scavenger Series Y Collectors Y250300 | $54.59 |
| Total | $4,752.74 |
 Having decided to do the 4×4 conversion, the next decision was how. My inclination was to find the parts and do the conversion myself so I set off to figure out what I would need. Internet researching lead to
 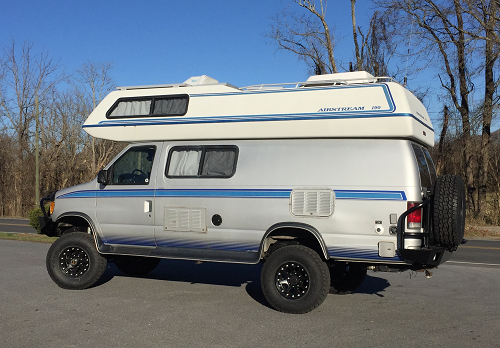 If you’ve seen us on the road you’re likely most interested in our 4×4 conversion. Before I get to that let me talk a bit about why we did it. We love our B190 but there are a couple things we don’t like. First is the suspension. When RV manufacturers turn a production vehicle like the Ford Econoline into an RV, they don’t always beef up the suspension to handle the extra weight. The B190 weighs in a little under 10,000 lbs. About 2/3 of that is on the rear axle. Tow any kind of trailer and it only makes it worse.
 If there was any one change that transformed Hugo into a viable full time home, it would be the refrigerator upgrade. If I had know how big a difference it would make I’d have done it sooner.
 Note that the C130 model comes in two flavors, one with an internal compressor and one with it external. Ours has the external compressor. Because of the curve of the B190’s body, there is a fair amount of space behind the lower part of the refrigerator. Just enough for the compressor. When you’re living in a small RV, every bit of space becomes precious. By having the external compressor we picked up enough extra space in the frig for another 6-pack. It takes a little more work to install since you have to mount the compressor but hey, an extra 6-pack!
 So our search for an Airstream B190 began. The B190 was only manufactured between model years 1989 and 2000 and there were only about 1,000 sold. (We have this neat
  So why did we do this? By “this” I mean embark on a journey to find a RV and live in it full time. I think I’ve always been a little restless staying in one place too long. During my career I’ve lived and worked in numerous states and a couple foreign countries. In the context of that rumbling, there were two events that proved to be the tipping point.
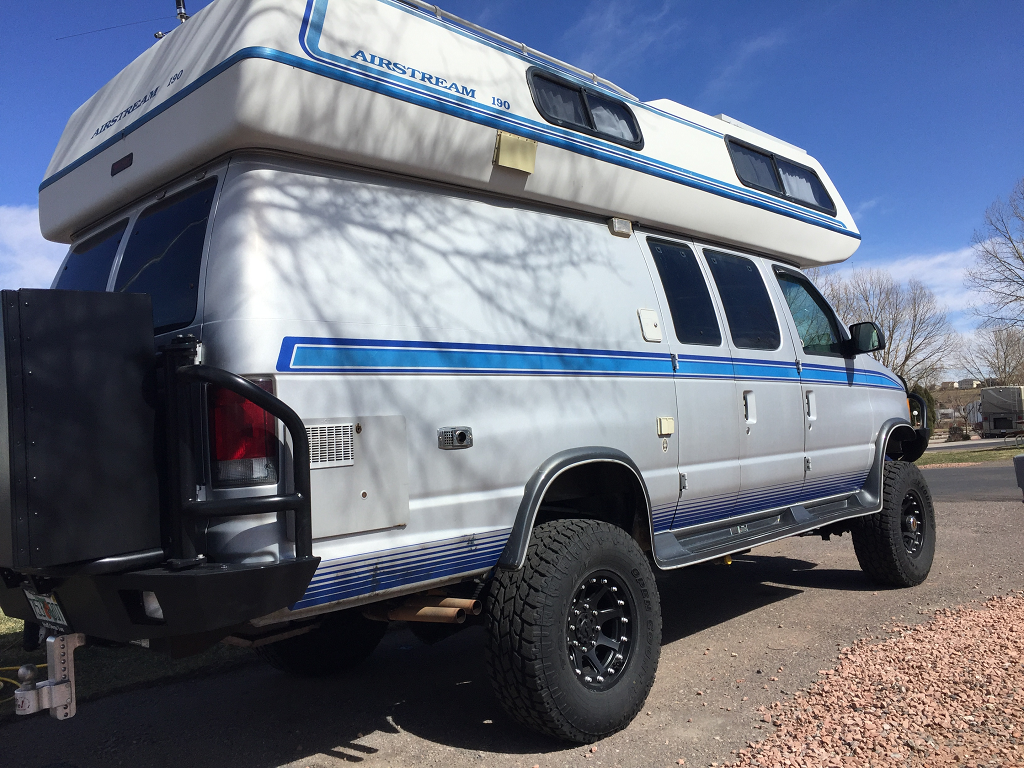 This is the story of how we turned our